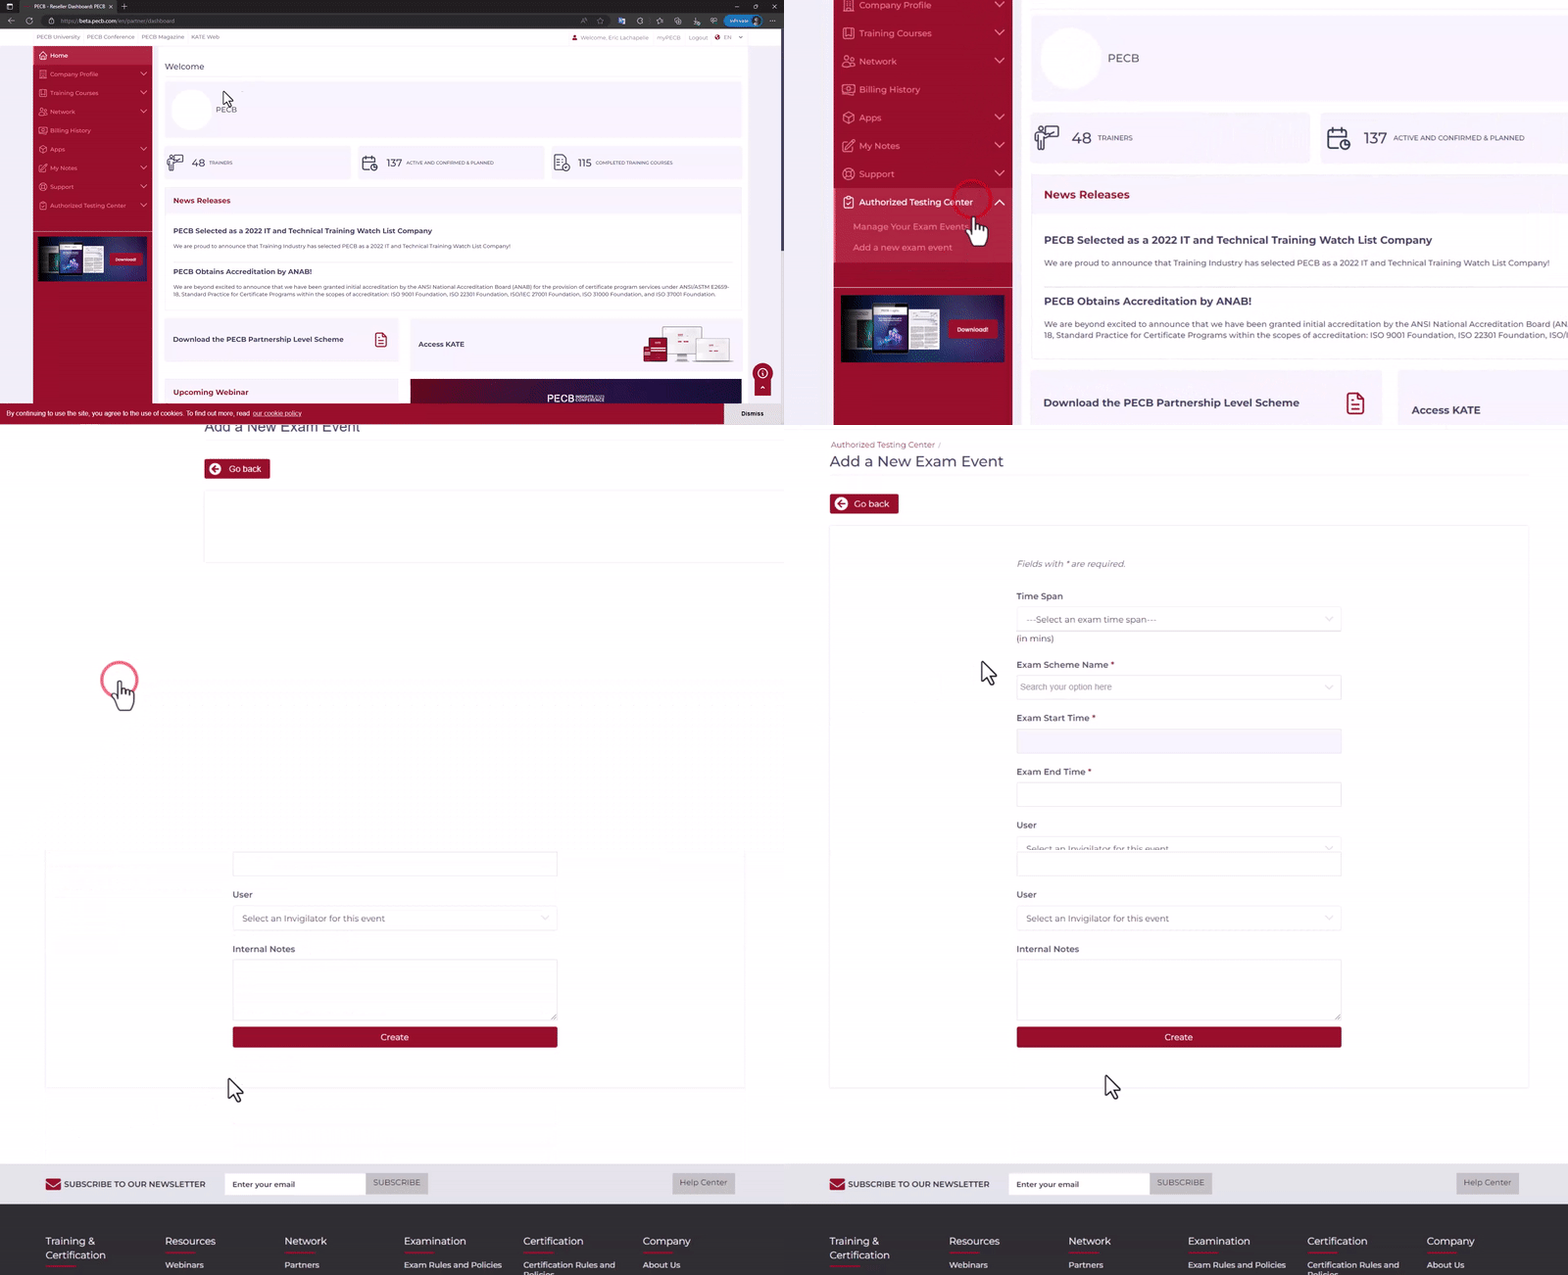
To create a private online exam session, follow the steps below:
- Log in to your PECB Partner Dashboard;
- Go to the Authorized Testing Center tab, and click the Add a new exam even tab;
- Fill in the mandatory fields and click the Create button.

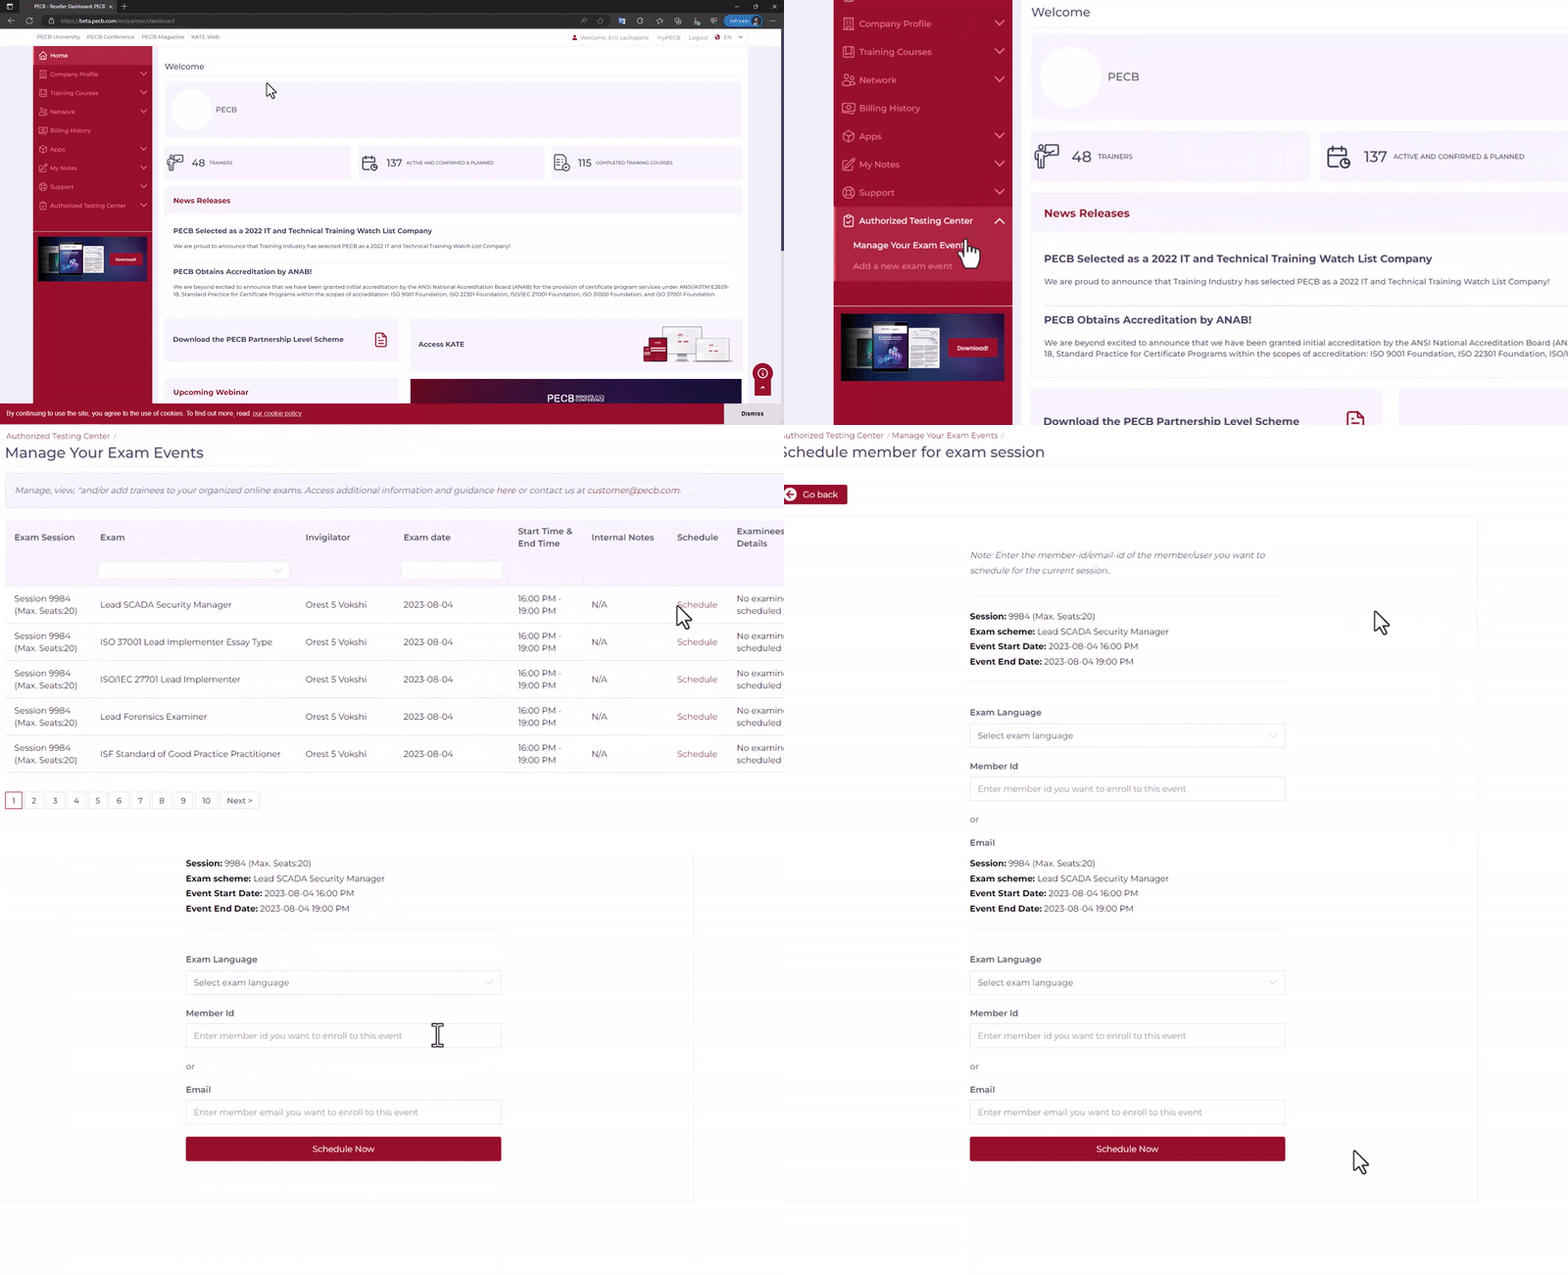
After creating the private online exam session, you can proceed to add the participants to the session by following the steps below.
- Go to the Authorized Testing Center tab and click on the Manage Your Examination Events section;
- At the created session, click the Schedule link;
Note: If the session has multiple exams, please make sure to click the Schedule link by the correct exam.
- Select the exam language;
- Provide the PECB Account ID or email address and click the Schedule Now button;
Please repeat the steps until you have added all the candidates.
After all the candidates have been enrolled, you can proceed to approve them in the session for the PECB system to send notifications to every candidate.
To approve the candidates, please follow the steps below:
- Click the View button on the right side of the private online exam;
- At the list of candidates, use the Take Decision link to approve the candidate(s).
